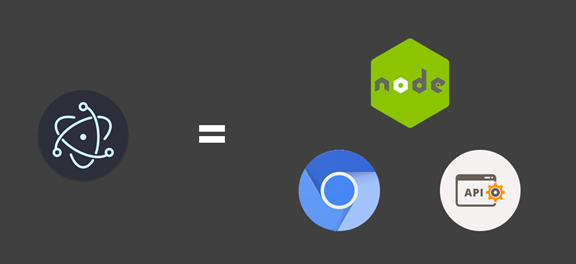
Electron程序快速上手!
Electron使用的基本流程就是:
- 安装 Electron 并初始化项目。
- 编写主进程、渲染进程和 HTML 文件。
- 通过
npm start 运行应用。
- 使用
electron-packager 或 electron-builder 封装为 .exe 文件。
首先,确保你已经安装了 Node.js 和 npm(Node 包管理器)。然后可以通过 npm 安装 Electron。
1
2
3
| node -v
npm -v
mkdir my-electron-app && cd my-electron-app
|

在终端中运行以下命令:
1
2
| npm init -y
npm install electron --save-dev
|
这会生成一个 package.json 文件,并安装 Electron。
使用npm install electron --save-dev安装如果出错,可以尝试使用淘宝 npm 镜像提供的 cnpm 工具来安装 Electron:
1
2
| npm install -g cnpm --registry=https://registry.npm.taobao.org/
cnpm install --save-dev electron
|
安装成功如下图。

建立一个项目目录结构,类似如下:
1
2
3
4
5
| my-electron-app/
├── package.json
├── main.js
├── index.html
└── renderer.js
|
在 main.js 文件中写入以下基本代码:
1
2
3
4
5
6
7
8
9
10
11
12
13
14
15
16
17
18
19
20
21
22
23
24
25
26
27
28
29
30
31
32
33
34
35
36
37
38
39
40
41
42
43
44
| const { app, BrowserWindow } = require('electron');
const path = require('path');
let mainWindow;
function createWindow() {
mainWindow = new BrowserWindow({
width: 800,
height: 600,
autoHideMenuBar: true,
webPreferences: {
preload: path.join(__dirname, 'preload.js'),
nodeIntegration: true,
contextIsolation: false
}
});
console.log("开始加载我的本地html")
mainWindow.loadFile('index.html');
mainWindow.on('closed', () => {
mainWindow = null;
});
}
app.on('ready', createWindow);
app.on('window-all-closed', () => {
if (process.platform !== 'darwin') {
app.quit();
}
});
app.on('activate', () => {
if (mainWindow === null) {
createWindow();
}
});
|
在项目的根目录中创建 index.html 文件,并添加你想要展示的页面内容:
1
2
3
4
5
6
7
8
9
10
11
12
| <!DOCTYPE html>
<html lang="en">
<head>
<meta charset="UTF-8">
<meta name="viewport" content="width=device-width, initial-scale=1.0">
<title>My Electron App</title>
</head>
<body>
<h1>Hello from Electron</h1>
<script src="renderer.js"></script>
</body>
</html>
|
在 renderer.js 文件中,可以添加 JavaScript,用于操作 HTML 页面。你可以在渲染进程中使用 Node.js 的功能。
在 package.json 中,添加一条脚本来启动 Electron:
1
2
3
| "scripts": {
"start": "electron ."
}
|
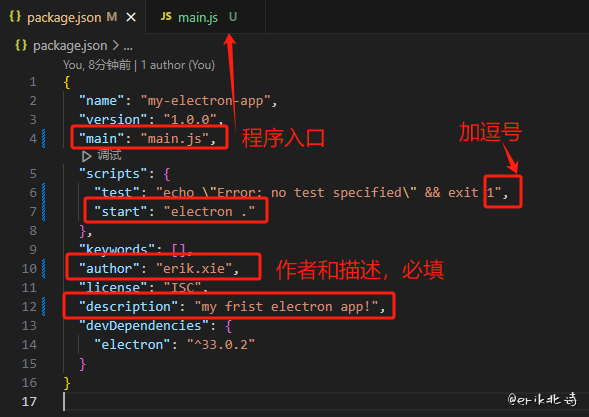
完整的package.json修改后:
1
2
3
4
5
6
7
8
9
10
11
12
13
14
15
16
| {
"name": "my-electron-app",
"version": "1.0.0",
"main": "main.js",
"scripts": {
"test": "echo \"Error: no test specified\" && exit 1",
"start": "electron ."
},
"keywords": [],
"author": "erik.xie",
"license": "ISC",
"description": "my frist electron app!",
"devDependencies": {
"electron": "^33.0.2"
}
}
|
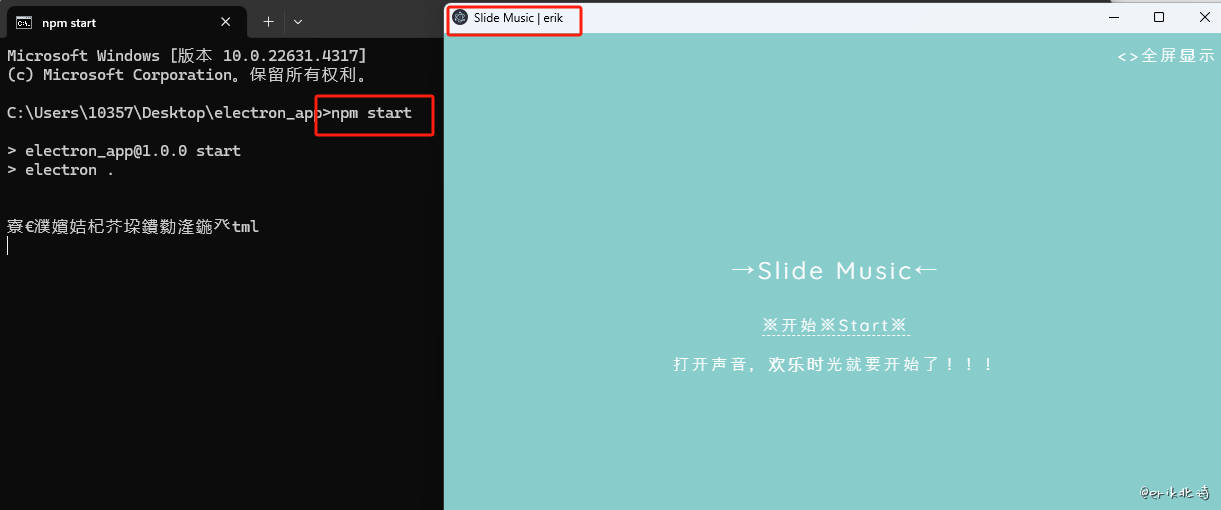
然后在终端中运行:
这将启动 Electron 并加载你的本地 HTML 文件。

Slide_Music加载,将Slide_Music拷贝到my-electron-app文件夹中。将main.js文件中的引入HTML语句修改为:
1
| mainWindow.loadFile(path.join(__dirname, 'Slide_Music/index.html'));
|
在程序中的开发者工具中出现错误:
1
2
| Uncaught ReferenceError: $ is not defined
at mikutap.min.js:1:1
|
jQuery 无法正确加载,需要确保 jQuery 在其他脚本之前加载,根据 HTML 文件,确认 jQuery 是在其他依赖 jQuery 的脚本之前加载。例如,在你的 <head> 部分,确保 jQuery 的 <script> 标签是第一个被加载的脚本。如下图:

用 window.jQuery 检查 jQuery 是否正确加载,为了确保 jQuery 已经加载,你可以在 mikutap.min.js 或 HTML 文件中的 <script> 标签中检查 window.jQuery 是否为已定义的对象:
1
2
3
4
5
6
7
8
9
10
11
| <link charset="utf-8" href="css/mikutap.min.css" rel="stylesheet">
<script>
if (typeof jQuery === 'undefined') {
console.error('jQuery is not loaded');
} else {
console.log('jQuery is loaded');
}
</script>
<script charset="utf-8" src="js/pixi.min.js" type="text/javascript" defer></script>
|
HTML中通过 __dirname 获取当前文件的绝对路径。在 main.js 中,你可以修改路径引用,将 preload 和 loadFile 中引用的文件路径改成使用 __dirname。
最终解决问题修改的地方:
检查 file:// 协议的限制:Electron 使用 file:// 协议来加载本地文件。在某些情况下,浏览器安全机制可能会阻止加载某些资源,比如 jQuery。如果你怀疑这个问题,可以尝试将 nodeIntegration 和 contextIsolation 设置为 false(注意这会降低安全性,仅用于本地应用):
1
2
3
4
5
6
7
8
9
| const mainWindow = new BrowserWindow({
webPreferences: {
preload: path.join(__dirname, 'preload.js'),
nodeIntegration: false, // 如果需要在渲染进程中使用 Node.js
contextIsolation: false,
enableRemoteModule: false, // 根据需要启用/禁用
webSecurity: false // 禁用 web 安全以允许跨域,处理跨域问题(可选)
}
});
|
最终修改nodeIntegration: false, // 如果需要在渲染进程中使用 Node.js将其修改fasle程序正常调用文件,成功运行。
完整的main.js文件内容如下:
1
2
3
4
5
6
7
8
9
10
11
12
13
14
15
16
17
18
19
20
21
22
23
24
25
26
27
28
29
30
31
32
33
34
35
36
37
38
39
40
41
42
43
44
45
46
47
48
49
50
51
52
| const { app, BrowserWindow } = require('electron');
const path = require('path');
let mainWindow;
// 创建主窗口
function createWindow() {
mainWindow = new BrowserWindow({
width: 800,
height: 600,
autoHideMenuBar: true,//自动隐藏菜单档
fullscreen: true, // 启动时全屏
webPreferences: {
preload: path.join(__dirname, 'preload.js'),
nodeIntegration: false, // 如果需要在渲染进程中使用 Node.js
contextIsolation: false,
enableRemoteModule: false, // 根据需要启用/禁用
webSecurity: false // 禁用 web 安全以允许跨域,处理跨域问题(可选)
}
});
// 加载本地的 HTML 文件
console.log("开始加载我的本地html")
// mainWindow.loadFile('index.html');
// 加载 HTML 文件
//在 main.js 中,你可以修改路径引用,将 preload 和 loadFile 中引用的文件路径改成使用 __dirname:
mainWindow.loadFile(path.join(__dirname, 'Slide_Music/index.html'));
// mainWindow.loadFile(`${__dirname}/Slide_Music/index.html`);
// 如果需要打开开发者工具
// mainWindow.webContents.openDevTools();
mainWindow.on('closed', () => {
mainWindow = null;
});
}
// 应用程序启动时
app.on('ready', createWindow);
// 当所有窗口关闭时退出应用(macOS 不同逻辑)
app.on('window-all-closed', () => {
if (process.platform !== 'darwin') {
app.quit();
}
});
app.on('activate', () => {
if (mainWindow === null) {
createWindow();
}
});
|
我的项目地址:
通过百度网盘分享的文件:3.electron
链接:https://pan.baidu.com/s/1OkF5N4YGA5oIjE9Xx3eWcA
提取码:8edx
要将 Electron 应用封装为可执行文件,可以使用 electron-packager 或 electron-builder 等工具。目前我使用的electron-forge。
首先,确保你已经全局安装了 cnpm。如果还没有,可以运行以下命令:
1
2
| npm install -g cnpm --registry=https://registry.npm.taobao.org/
cnpm install --save-dev @electron-forge/cli
|
恢复到默认源npm config set registry https://registry.npmjs.org/
- 确保你已经安装了 Electron Forge(如果还没安装,可以使用淘宝源进行安装):
1
2
| npm install --save-dev @electron-forge/cli --registry=https://registry.npmmirror.com
npm install electron-squirrel-startup --save --registry=https://registry.npmmirror.com
|
检查是否正常安装:npm exec @electron-forge/cli --version
初始化 Electron Forge:
1
| npx electron-forge import
|
npx electron-forge import运行这个步骤会报错,下面使用其他包管理器:
- 使用不同的包管理器:
1
2
| npm install -g yarn --registry=https://registry.npmmirror.com
yarn install
|
- 添加打包配置(如果需要,可以在
package.json 中配置打包选项)。例如:
1
2
3
4
5
6
7
8
9
10
11
12
13
14
15
| "scripts": {
"make": "electron-forge make"
}
"build": {
"appId": "com.yourapp.id",
"productName": "YourAppName",
"files": [
"out/**/*",
"node_modules/**/*",
"package.json"
],
"mac": {
"category": "public.app-category.utilities"
}
}
|
4.打包你的应用:
1
| npx electron-forge package
|
运行之后会报错,目前还没有更好的解决方法,暂且不管。
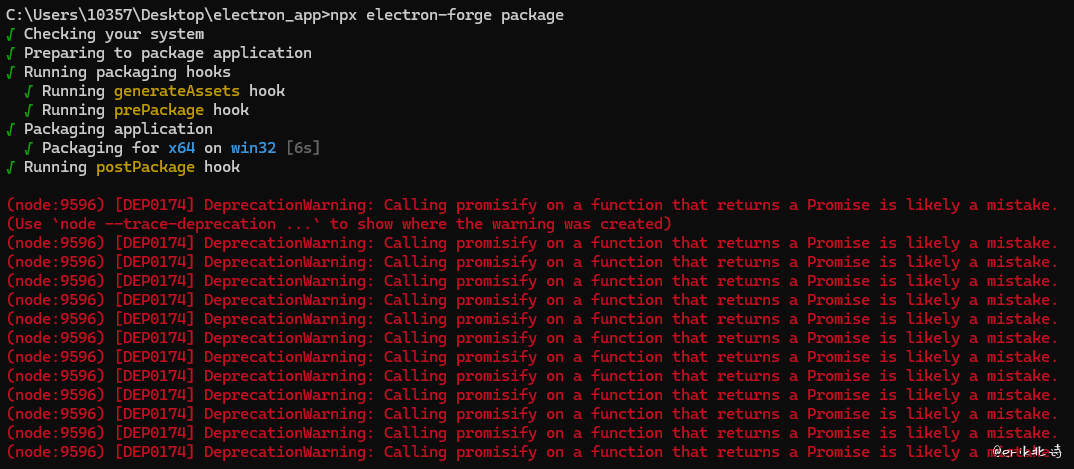
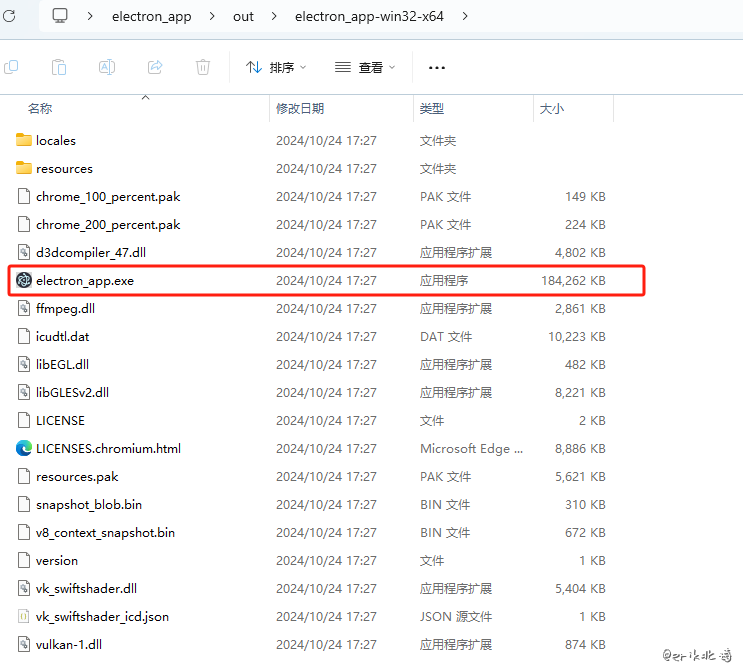
5.生成可执行文件:在out文件夹中,能正常运行。
1
| npx electron-forge make
|
